Benjamin Knowles
Anthony Chami
Christopher Stringer
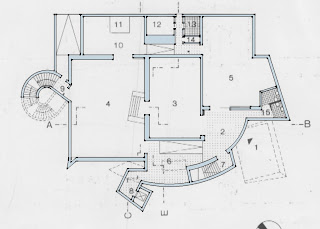
 Stage One: To begin the modelling process we placed the floor plan within Google Sketch-Up before then tracing the outline using the pencil and arc tools in association with the protactor to ensure corners, normals and wall thickness remained precise, as this stage would be the foundation of the entire model.
Stage Two: This stage involved simply raising (using the push pull tool) the traced out floor plan outline to the maximum height of the entire building, found using the elevations.

Stage Three: This particular stage involved precisely placing each of the sections and elevations provided as well as the second level floor plan. This stage was slightly difficult due to the point that each drawing needed to be scaled to a uniform dimension.
 Stage Four: This stage involved using the placed and scaled sections, elevations and floor plans to cut away un-needed wall material from the previously raised outline. This included doorways and opening as well outlining the placement of some windows.
 Stage Five: This stage involved the forming of the basic cross skylight location and rotation, as well as other features of the building such as the triangular corner skylight, in the most basic and pure forms.
Stage Six: This stage involved completing the cross skylight, excluding the actual skylight glass and fame. However such included the two level height cut at the base of the cross, as well as the formation of the curved wall entering in the middle.
 Stage Seven: This stage focused on completing the rear of the building, including the final placement of doors and windows, as well as the installation and placement of the roof.
Stage Eight: This stage saw the completion of most of the basic exterior form pieces, such as the skylights, as well as most of the roofing. However not including the curved roof at the front of the building and unique form over the main entrance.
Stage Eleven: This stage saw the completion of all the basic forms of the model, including the spiral stair case and unique piece over the main entrance. All left to complete is the skylight frames and glass as well as a few little windows.
- Additional Research -
To complete the modelling task of the Vitra Design Museum our group didn't really require much additional material as we found the provided images and drawings quite adequate. However we did use the two following images below as additional reference points.


No comments:
Post a Comment